Since version 3.0 Directorypress Offer seamless user experience at Backend with ajax based operations, At the end of this short tutorial you will be able to create a range of custom fields without any doubt in mind. Watch Video or follow step by step guide below
Step: 1 #
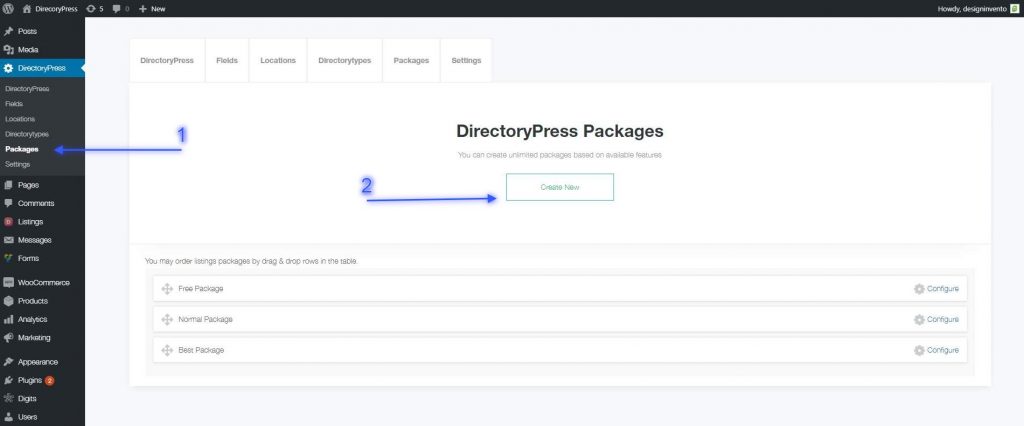
- Browse to DirectoryPress => Packages(fig:1.1)
- Click Create New (fig:1.1)
Step: 2 #
All fields with * are required
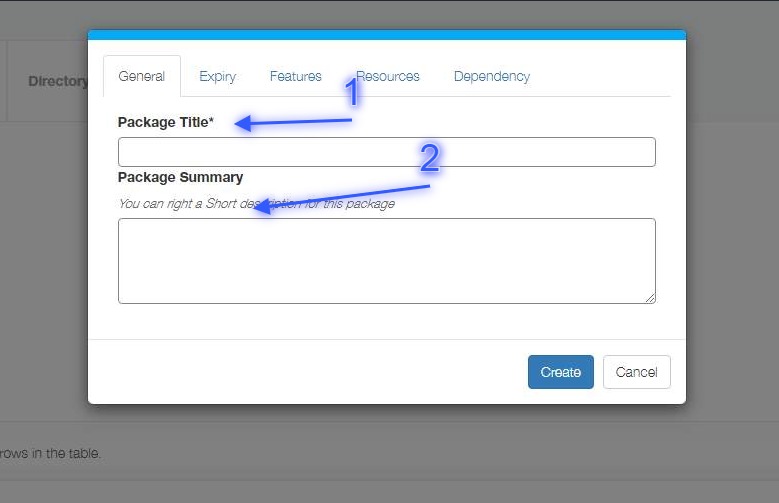
- Enter Package Title (fig: 1.2)
- Enter Package Description – optional (Fig: 1.2)
Step: 3 #
All fields with * are required
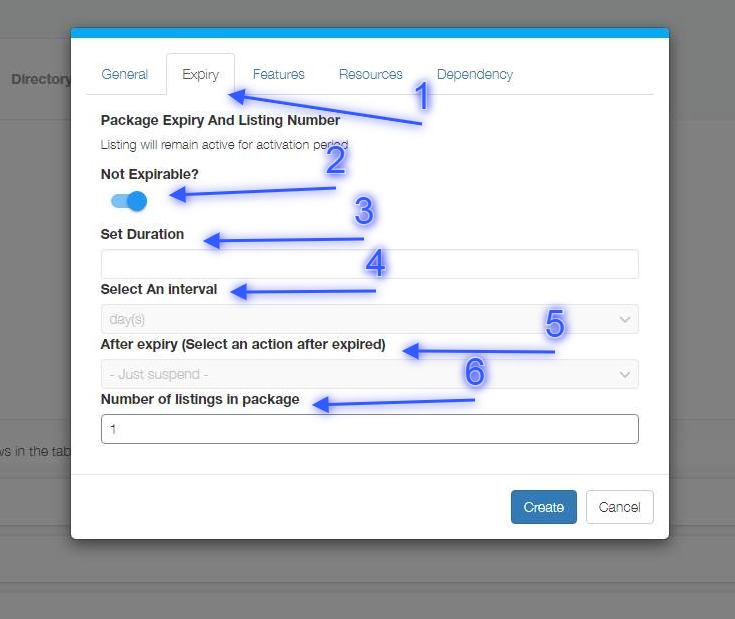
- Click Expiry Tab (Fig: 1.3)
- If turned on, Any listing in this package would not expire at all. to set custom expiry turn this option off. (Fig: 1.3)
- Set Package duration (Fig: 1.3)
- Set interval in days, weeks, months or year (Fig: 1.3)
- Select whether listing would be suspended or down-grade to another package after expiry (Fig: 1.3)
- Allow number of listing in package, if 1 listing allowed, this plan would work as pay per listing. (Fig: 1.3)
Step: 4 #
All fields with * are required
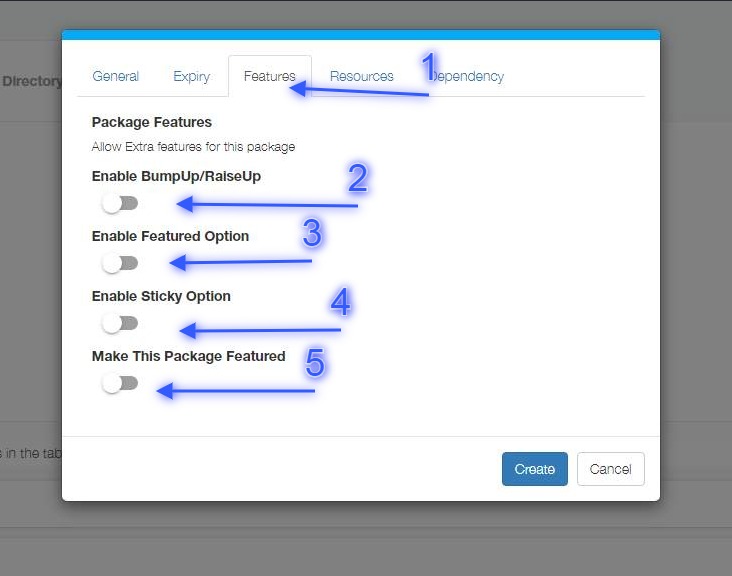
- Click Features tab (Fig: 1.4)
- If Enabled user would have option to bumpup/raiseup or boost any listing. this option can be paid (Fig: 1.4)
- If Enabled all listings in this package would have Featured tag (Fig: 1.4)
- If Enabled all listings in this package would have sticky feature and would stay at top (Fig: 1.4)
- If Enabled This package would be prominent from other at choose package page.(Fig: 1.4)
Step: 5 #
All fields with * are required
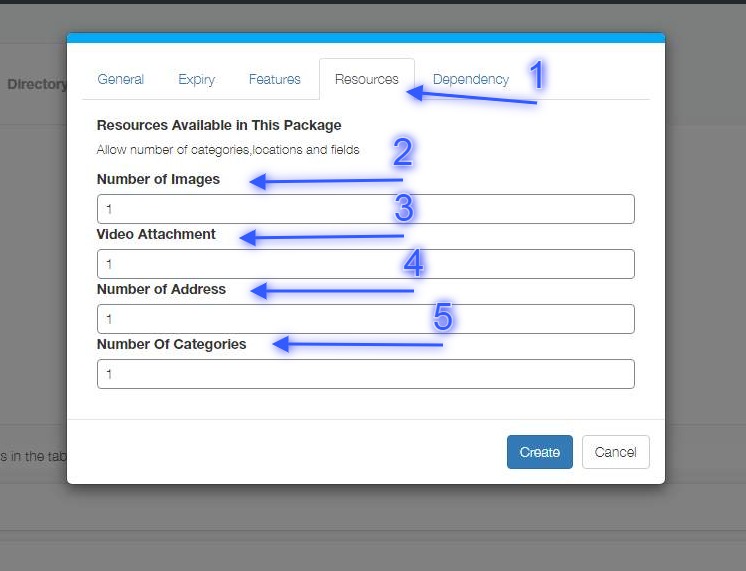
- Click Resources tab (Fig: 1.5)
- Set number of images allowed per listing in this package (Fig: 1.5)
- Set number of video attachments allowed per listing in this package (Fig: 1.5)
- Set number of address allowed per listing in this package (Fig: 1.5)
- Set number of categories allowed per listing in this package (Fig: 1.5)
Step: 6 #
All fields with * are required
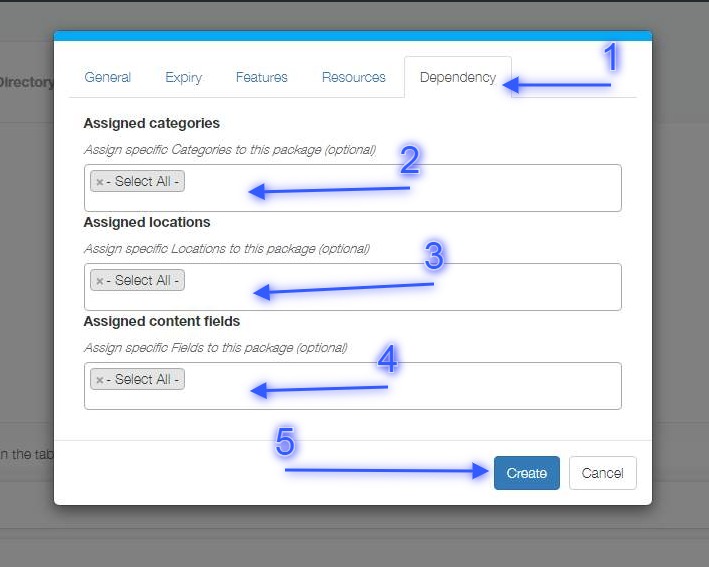
- Click Dependency Tab (Fig: 1.6)
- You can assign certain categories to this package, or keep select all to allow all categories (Fig: 1.6)
- You can assign certain locations to this package, or keep select all to allow all locations (Fig: 1.6)
- You can assign certain Fields to this package, or keep select all to allow all Fields (Fig: 1.6)
- Click create button to complete process (Fig: 1.6)
Step: 7 #
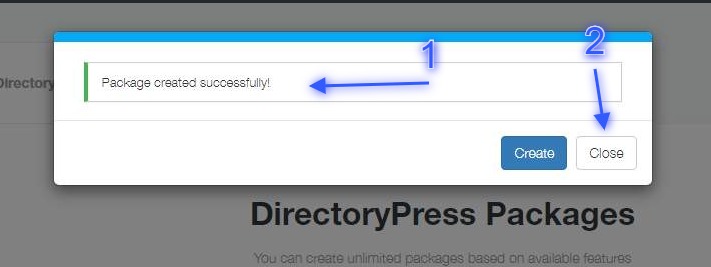
- Success message would appear upon completion.(Fig: 1.7)
- Click close button to exit (Fig: 1.7)


