Since version 3.0 Directorypress Offer seamless user experience at Backend with ajax based operations, At the end of this short tutorial you will be able to create a range of custom fields without any doubt in mind. Watch Video or follow step by step guide below
Step: 1 #
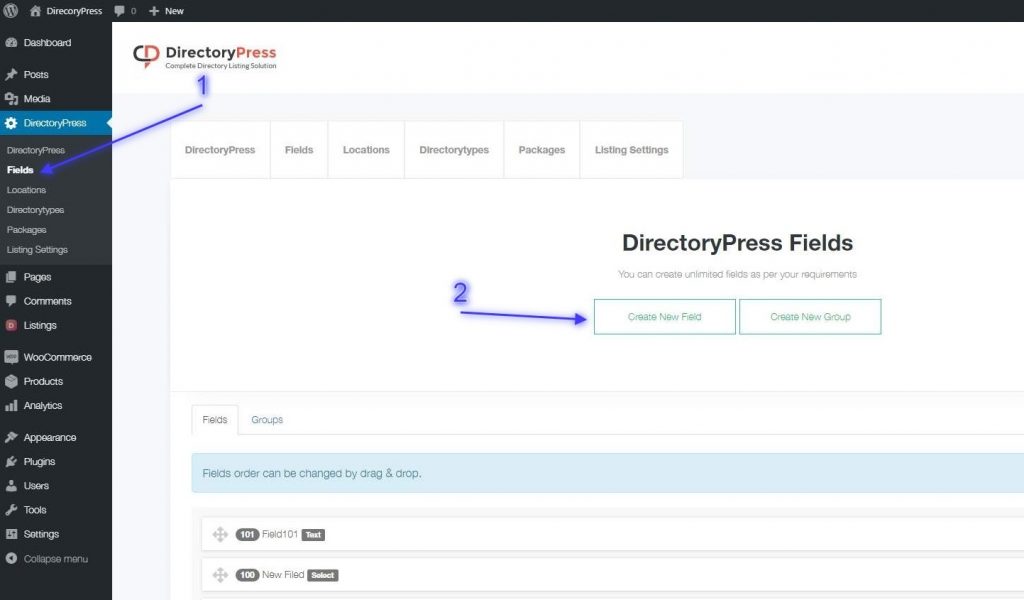
- Browse to DirectoryPress => Fields (fig:1.1)
- Click Create New Field (fig:1.1)
Step: 2 #
All fields with * are required
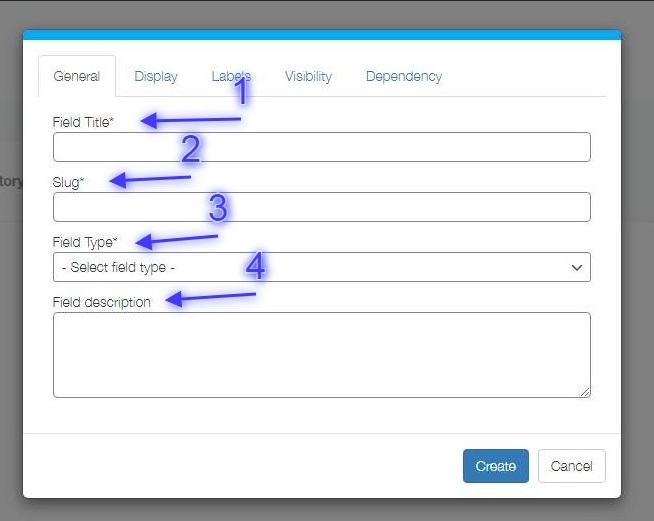
- Enter Field Title (fig: 1.2)
- Enter Field Slug (you can use – or _ in slug but no special characters allowed. Fig: 1.2)
- Select a Field type from available range.
- Description field is optional to show some text on listing submission form
Step: 3 #
All fields with * are required
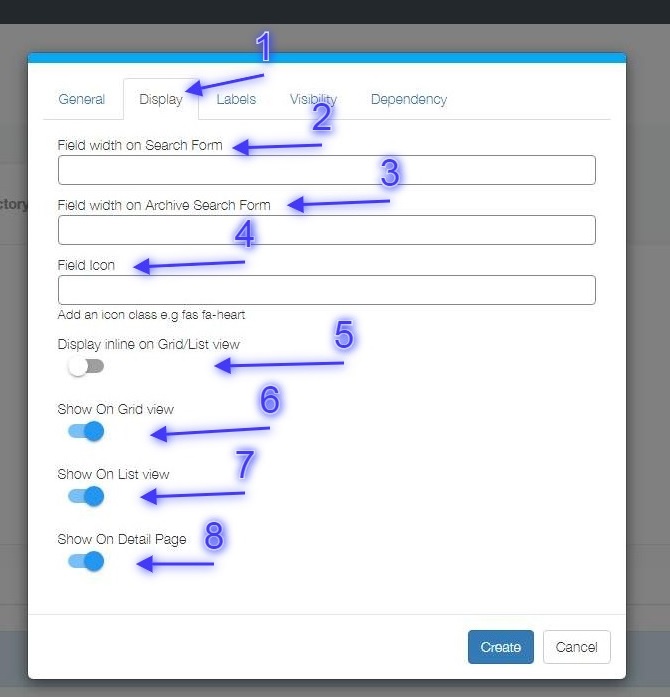
- Click Display Tab to configure Field display options (Fig: 1.3)
- Enter Field Width for custom search form (e.g 50 or 70) value is in % (Fig: 1.3)
- Enter Field Width for search form on search result, category, locations and tags pages (e.g 50 or 70) value is in % (Fig: 1.3)
- Enter icon class e.g ( fas fa-heart) you can use custom icons classes offered by a theme or third party plugins as well. (Fig: 1.3)
- if turned on -> Field will show as inline on grid view or list view (Fig: 1.3)
- if turned on -> filed will show on listing grid view (Fig: 1.3)
- if turned on -> Field will show on listing list view (Fig: 1.3)
- if turned on -> Field will show on listing single page (Fig: 1.3)
Step: 4 #
All fields with * are required
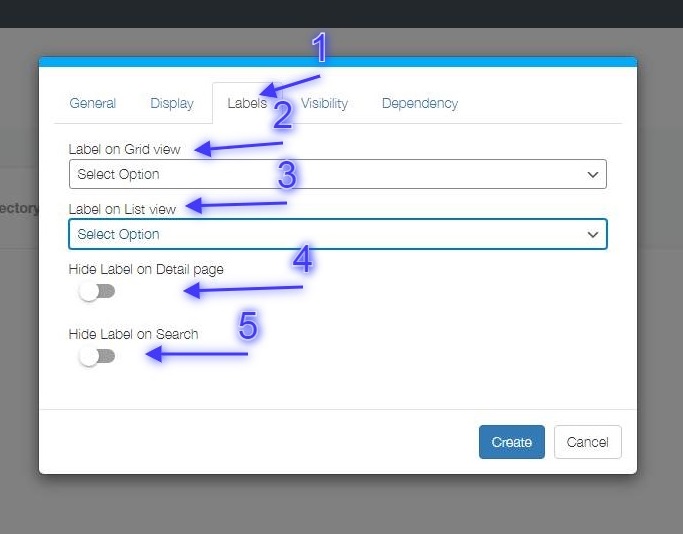
- Click Labels Tab to configure Field labels (Fig: 1.4)
- Select a option for label to show on listing grid view (Fig: 1.4)
- Select a option for label to show on listing list view (Fig: 1.4)
- If turned on -> Field title will be hide on listing single page and would show only value (Fig: 1.4)
- if turned on -> field label will be hide on search form (Fig: 1.4)
Step: 5 #
All fields with * are required
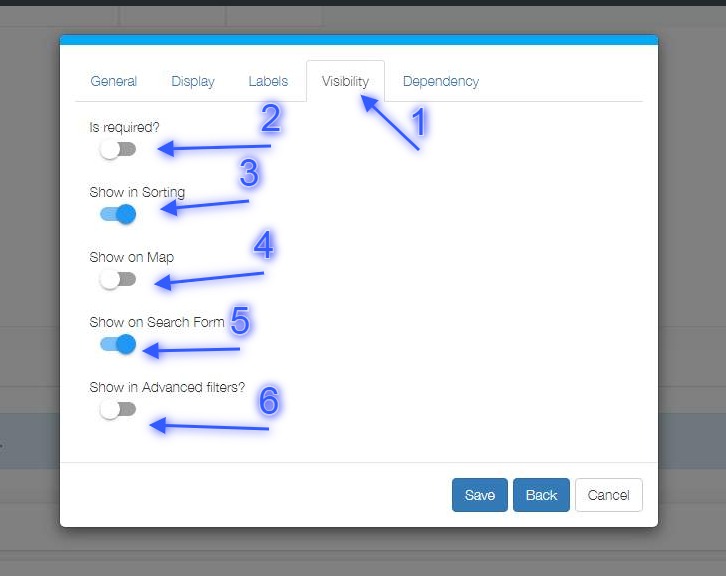
- Click Visibility Tab to configure filed visibility (Fig: 1.5)
- turn on to make this field required on listing submission form (Fig: 1.5)
- If turned on -> Field will be added in sorting option depended on field type (Fig: 1.5)
- If turned on -> field will be added in map info window depended on field type(Fig: 1.5)
- If turned on -> field will be added in Search form, depended on field type(Fig: 1.5)
- If turned on -> field will be added in advanced Search section, depended on field type(Fig: 1.5)
Step: 6 #
All fields with * are required
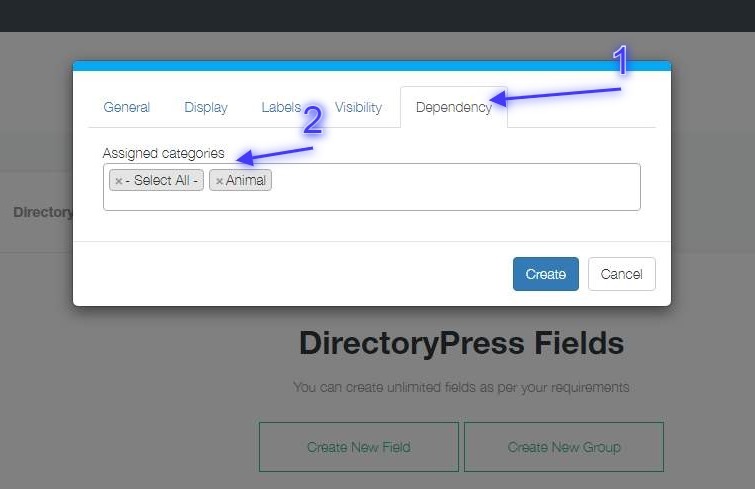
- Click Dependency Tab to assign this filed to specific categories, you can select multiple categories or select all to show this Field for all categories (Fig: 1.6)
- If turned on -> field will be added in map info window(Fig: 1.6)
- Finally click create button to complete the process
- Hit close button after successfully creation (Fig: 1.7)


