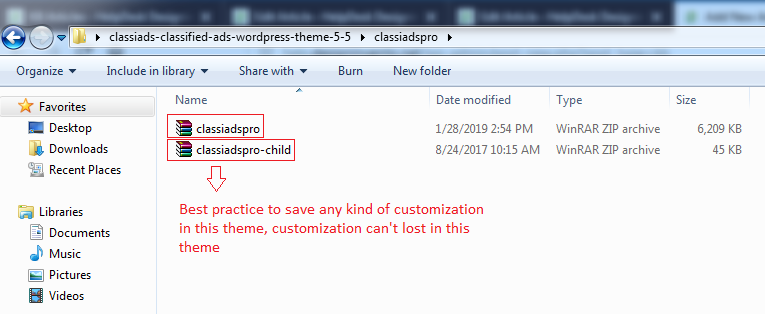
Once you download The classiads Theme, unzip the main package (Theme Forest-8625840-classiads-classified-ads-WordPress-theme). You can see classiads-classified-ads-wordpress-theme-*version-digits*) folder go into it. There should be complete two versions “Classiads-deprecated” which is our old version which we only contain for the old users, Who don’t wanna move to the pro version and “Classiadspro” which is our most recommended and latest one.

You need to go in “Classiadspro” and it has the following folders:
classiadspro.zip #
The theme zip file that you need to upload into your WordPress themes directory
classiadspro-child.zip #
The child theme zip file you need to upload into your WordPress themes directory “optional” for only when you want to have some custom work. so that you won’t change in the main theme. In this case, you’ll not lose your customization when you update the theme.

The classiadspro can be installed in three different ways: #
- Installing through WordPress
- Uploading through FTP (File transfer protocol)
- Uploading through C-panel
Installation through WordPress: #
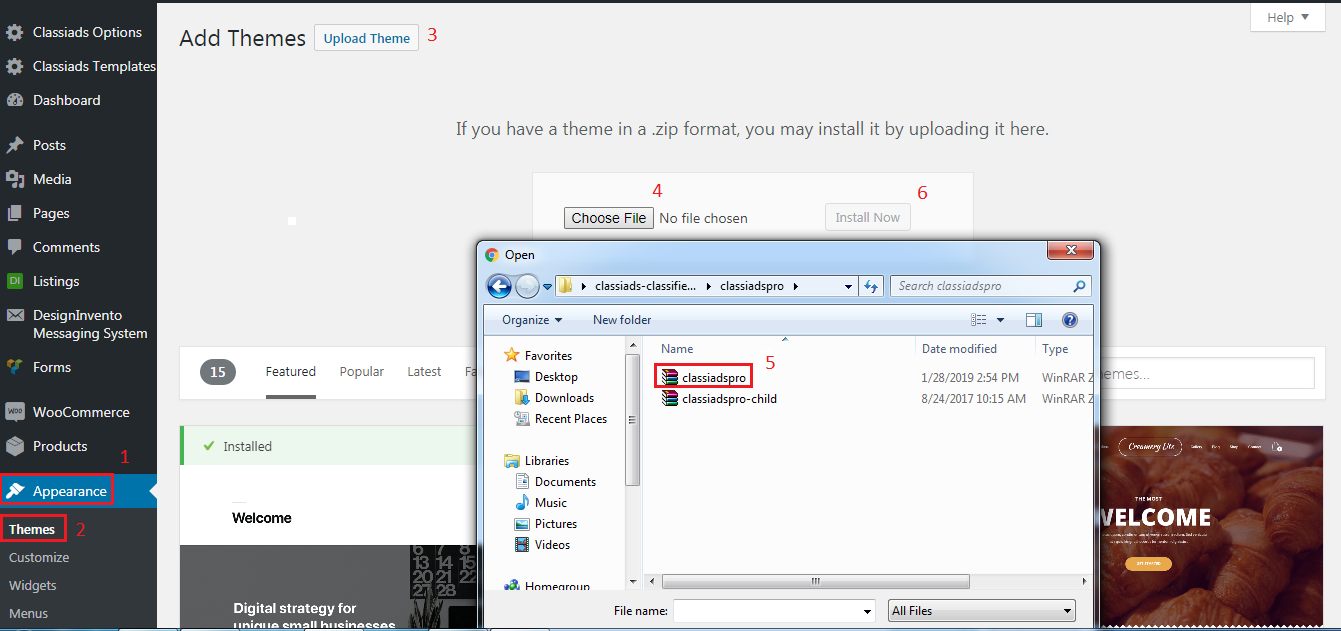
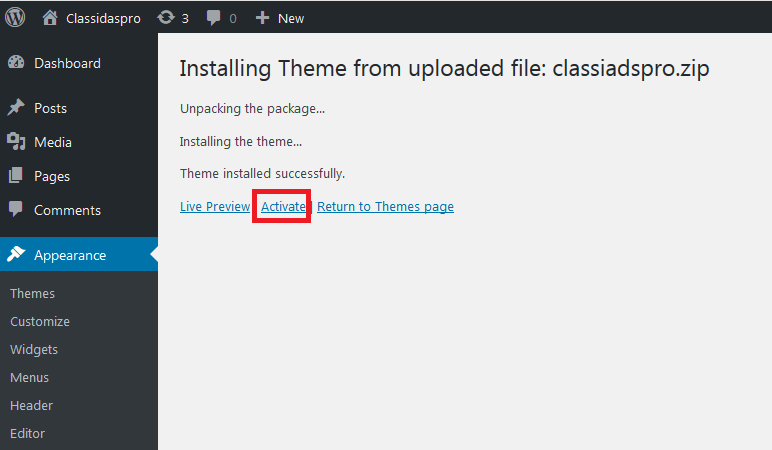
Installing a theme through WordPress is quite a simple process. After you have logged into WordPress account and are ready to go, in the admin panel’s sidebar navigate to appearance and then select themes. After that, click on the upload theme button then click “choose file” button and locate your theme zip file (classiadspro.zip) then hit install now. After The classiadspro has been installed locate and click activate.


While installing your theme through WordPress admin, you may encounter an error message saying “are sure you want to do this?”. This is mainly due to your hosting PHP settings. The classiadspro theme zip file is roughly around 5mb and in some hosting the default value for max_upload_limit left default which is 2mb. To solve this problem you should either increase your maximum upload size (to 20mb) on your hosting admin panel or ask your host to do it for you if you do not have the privilege to alter your server PHP settings. This is a very common request and they should be able to help you out. Once the limit is increased you can re-try the install and you’ll be all good to go.
Installation Through FTP #
- Download the Theme archive and extract the main theme zip file it contains (classiadspro.zip).
- You may need to preserve the directory structure in the archive when extracting these files. Some software like “WinRAR” create a sub directory with the same directory name they have unzipped. uploading the theme to your server via FTP with this structure is WRONG and you will face some errors.
- Use an FTP client (for example FileZilla) to access your host web server
- Transfer your unzipped theme to your server in the WP-content/themes
- Once the theme is uploaded, you need to activate it. Go to Appearance > Themes and activate your uploaded theme.
Installation through C-panel #
You have to login your c-panel then go to file manager > domain directory > usually would be (public_html) > wp-content > themes > upload classiadspro.zip here > unzip classiadspro.zip
Install Required Plugin #
After theme activation, System would redirect to Appearance -> Installed plugins -> install and activate Classiads Templates Plugin and follow setup here


